So let's not be casual. I'm pretty busy these days, but as I have time, I'm going to go through and look at what each of the major settings does to a range of sample clips, and hopefully provide a better reference than the scattershot documentation that's out there currently.
Now, obviously I don't have time to test everything, and I'm not a plugin author or somebody who is particularly skilled at programming. This is all to say: don't just take my word for it. Test for yourself, and see what works for you. If you find something different, or an edge case that I haven't covered, great. Leave me a comment below, and I'll see if I can replicate your results. If so, I will update this blog post.
Some things to get out of the way up front:
- I'm currently using AVISynth+ 3.7 64-bit with version 3.376 of QTGMC. If you're using an older (or newer) version of either of those, you may have different results. I will update the version numbers on results below if they differ.
- I won't compare this to VapourSynth's havsfunc implementation - at least not right away. In theory, you should have the same results, but I have noticed chroma shifting differences in the past. I'm not currently using VapourSynth, however, and am not nearly as familiar with it.
- My source footage is mostly DV, which has a very nonstandard chroma subsampling method (4:1:1). As such, the color information in your video may behave differently then shown here. The black and white (aka luma) portion of the image should be similar, although depending on the source noise in your original footage, things might be different there as well.
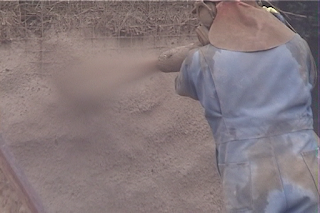
- The first clip I'm going to use to test everything is from a 15+ year old video about building straw bale houses. It was shot on a consumer DV camera (not by me), and IMO has a good combination of in-camera sharpening and a range of both noise and detail. I'll try and find a less pre-sharpened image for comparison at some point.
Please click on the pictures to enlarge. Even better, this will bring up the "lightbox" so you can flip between pics with the left and right arrow keys on your keyboard. Sorry about the lack of labels in the lightbox - I'm looking into that.
Test 1 - Overall Presets
There are a total of 11 main preset options for QTGMC: Draft, Ultra Fast, Super Fast, Very Fast, Faster, Fast, Medium, Slow, Slower, Very Slow, Placebo.
Draft
This preset is pretty much only useful as a way to check and see if your field order is set correctly. It uses a simple "bob" deinterlacing method that makes essentially no real effort to create full resolution progressive frames.
Ultra Fast
This preset uses Yadif as a deinterlacing method, and looks similar to what you would get out of VirtualDub (Which uses Yadif by defualt for deinterlacing) or some real time commercial video processing devices. It does at least give a doubled frame rate, but I would only use it for comparison with other methods.
Super Fast
Here's the first preset that takes advantage of QTGMC's features. You'll notice immediately that the blocky effects of the first two presets are gone. Personally, I think this looks ever so slightly softer than most of the other presets - possibly because it uses TDeint rather than NNEDI3 for deinterlacing?
Very Fast
You'll notice that fine detail is a bit clearer, and some overall sharpening appears to be applied. Noise reduction is kept to a minimum, however. There's also a sort of haloing artifact around edges of fine detail.
Faster
Not a huge difference in sharpness here, but if you look closely at the tassels, you'll see that they look a bit clearer. Haloing is still present, and for some reason, there's an added line artifact on the right side that isn't present in any of the other presets. Not sure why.
Fast
This is the first preset that I would actually consider using. The haloing artifacts are gone, a little extra sharpening appears to have been added, but the image doesn't look terribly "smoothed".
Slow
By flipping back and forth between medium and slow, I can see that the interpolation has resulted in very slightly different images, but I don't really notice a big distinction in quality between them.
Slower
This is QTGMC's default preset, and I can definitely see how some people don't like it. While it does remove more of the artifacts from the video, it definitely has more of a "smoothed" look to it, with a slight smudging of details. Again, you would have to look at these back to back to really see the differences in my opinion, but this is starting to look a little over processed. On the other hand, if you're processing video for online streaming services, you might prefer this to keep recompression artifacts to a minimum.
Very Slow
Like Slower, but more so. More image detail is smoothed away, but more artifacts are removed as well.
Placebo
Aptly named, although I can see very slightly more smoothing applied to the image. I personally would never use this because of the ridiculously long processing times, but if you ever wondered what it does, here you go.
Test 2 - Sourcematch/Lossless
Because I'm not specifying anything else in the command, you can assume that the rest of the settings are at default (essentially preset=Slower). The main difference I can see is that Lossless on its own has some combing artifacts, and SourceMatch=1 is a bit softer than the rest.
SourceMatch=1
SourceMatch=2
SourceMatch=3
Lossless=1
Lossless=2
SourceMatch=3, Lossless=1
SourceMatch=3, Lossless=2
Test 3 - Noise Reduction settings
These are pulled from the QTGMC examples section.
Full denoise
NoiseProcess=1, NoiseRestore=0.0, Sigma=4.0
Does what it says. Beware of the "waxy" look with this one.
Restore all noise
NoiseProcess=1, NoiseRestore=1.0, Sigma=2.0
Yup, this works as described as well.
Restore all "stable" grain
NoiseProcess=1, GrainRestore=1.0, Sigma=2.0
This setting is a bit more interesting. It attempts to find more "stable" elements of noise and restore it to the image. This results in reducing the flat/waxy appearance of a full denoise, but still removes a lot of noise. Not sure if I'd use it all the time, but I could see some benefit.
Suggested settings for "Strong Detail/Grain"
NoiseProcess=2, GrainRestore=0.4, NoiseRestore=0.2, Sigma=1.8, NoiseDeint="Generate", StabilizeNoise=true
Reference
Just for reference, here's the original interlaced frame:
And here's one of the individual fields:
And here's the same frame processed with Yadif in VirtualDub2:


