Tuesday, May 4, 2021

Which deinterlacing algorithm is the best? Part 1 - HD interlaced footage

Before I began, I'd like to give a special thanks to Aleksander Kozak for his help in testing and providing the HD footage used in this post.

Also, this is part 1 of a series of posts. When I've finished part 2, I'll link to it here.


Background

One of the things about working as an editor is that the technology is constantly changing.  There are new pieces of software, plugins, and even hardware that are released on a regular basis, and keeping up with all of it can be challenging.

Roughly about 10 years ago, deinterlacing had four general types of solutions: 

- Hardware-based video conversion boxes like the Teranex that are designed to perform resolution and frame rate conversions in real time.  Simple, but not always the best quality, and the hardware is pretty expensive (especially when you consider that you also need both a separate dedicated playback device and a recording device in addition to the conversion box).

- Services like Cinnafilm's Tachyon that do the same sort of job using very complex and proprietary software and hardware on a rental (or on-premises, for a higher fee) basis.  Great results, but very expensive.

- Built-in deinterlacing within video editing programs.  I haven't used either Media Composer or Final Cut Pro X's implementation, but with everything else I've tried, this is garbage.  Unless your entire project from beginning to end uses interlaced settings, editing programs tend to toss out every other field and line double the remaining field, which cuts both motion detail and frame detail essentially in half. The only way I've seen to get around this inside an editing program is to use the FieldsKit plugin, which works a bit better than real-time conversion boxes, but not as well as SAAS options like Tachyon.

- Open source video filters.  For a while, your only options here were frame blending and "bob" deinterlacing, neither of which were particularly great.  Most early tools for dealing with interlacing in this space focused more on combining similar fields together - mainly as a result of them being geared towards processing TV captures of anime.  Slightly later methods like Yadif improved on deinterlacing quality, but were still only working on individual fields, using still image interpolation to essentially round off the edges of aliasing after line doubling.

That all changed when QTGMC came along. Like its less-optimized forerunner TempGaussMC (which I've never used), QTGMC is an AVISynth deinterlacing script that uses a combination of several different plugins. It separates out individual fields and tries to use data from surrounding fields to generate full resolution progressive frames from them.  This is very similar to what "motion flow" and other motion interpolation algorithms do on modern TV sets, but focuses on accuracy rather than wow factor.  While it's not trivial to set up, the end results are excellent, combining greater detail with highly configurable noise reduction and other options. In some ways, the results can actually be better than many of the above solutions.

But it's always good to do a reality check periodically - which of these methods works best? I don't have access to a Teranex or the cash to use Tachyon, so I'll be comparing mostly free options and/or ones embedded in >$300 programs.


TL:DR

If you don't want to read through the entire post, here's my opinion about each of the options that I currently have access to:

QTGMC: Best retention of original image detail and handling of edge case artifacts, but you have to watch for colorspace issues when working with Adobe programs if you render out using FFMPEG. Also, different options can change smoothing and noise reduction quite dramatically.

Topaz AI: Excellent results that can be occasionally thrown off by oversaturated colors and constantly fluctuating semi-transparent detail (like heat haze).  Best used for upconverting content to higher resolutions.  Also uses FFMPEG to render out results, so some codecs can have the above-mentioned colorspace issues.

DaVinci Resolve 17 Studio: Solid deinterlacing, but can also be thrown off by oversaturated colors.  Not as much smoothed detail as the other options, but in motion most viewers probably wouldn't notice.

Bwdif (FFMPEG): Good at reconstructing smooth lines and retaining overall image detail with SD content, faster than QTGMC but not as good.

Estdif (FFMPEG): Good at reconstructing smooth lines and retaining overall image detail with HD content, faster than QTGMC but not as good.

Yadif (FFMPEG): Just does interpolated line double of each single field rather than taking surrounding fields into account.  Diagonal high contrast lines have weird "rounded" jaggies that some (like me) might find displeasing. Very fast.

Bob, Weave, etc - These are all variations on very basic line-doubled deinterlacing. Bob would be my preference out of these, but in general I would only use them if you absolutely have to.

Premiere, Resolve (non-Studio), editing programs in general - Garbage. Cuts both resolution and framerate in half. Note that I'm only talking about the standard deinterlacing inside of these programs - you can get/install plugins that can do a much better job.


Let's check out some examples:


First clip - 25i HD material

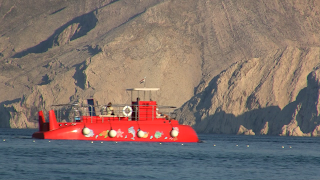
This was a tough clip for the commercial options to deal with due to some issues with the very oversaturated reds, but I feel like it shows off the differences between deinterlacing methods pretty well. Also, the differences between these methods are much less noticeable in motion.

(Please click pictures to enlarge)


Original


This is what an interlaced frame looks like - two fields woven together. Obvious combing artifacts. If you look close, you can see the issue with the edges of the oversaturated reds - some interlacing artifacts don't line up with the interlacing lines. I've actually never seen this before, but I feel like it turns out to be an interesting indicator for what various methods actually do.


Bob (After Effects, Premiere Pro, many other editing programs)


This is just the original image run through After Effects. By default, AE uses a terrible method to display interlaced footage that drops every other field and does a simple line double for the remainder. However, it does get rid of the interlacing artifacts in the oversaturated red.

DaVinci Resolve 17 Studio


This is a recent edition to the paid ($300) version of Resolve that supposedly uses some "Neural Engine" processing for frame interpolation. Decent handling of edges, but tripped up by the oversaturated red. I would consider this a good solution for most work,


Topaz AI


Really good recovery of detail throughout the image, as well as adding some extra detail (that's kind of it's thing).  However, it's thrown off a bit by the haze around the railing, and once again doesn't deal well with the interlacing artifacts in the oversaturated red.


Now, let's check out the FFMPEG (and other programs that use FFMPEG) options:


Yadif


Works, but look at those railings. Remember, Yadif is just taking the individual fields and using smoothing algorithms to resize them. I personally don't like the results, but it's better than nothing.


Estdif


Much better, although some details like the lower contrast parts of the railing aren't as defined as I'd like. Unlike Yadif, it's at least attempting to do interpolation using surrounding frames, and as a result takes a speed hit. My recommendation for FFMPEG-only deinterlacing of HD content.


Bwdif


My favorite FFMPEG-only method for deinterlacing SD content does a bit worse here - the edges look a bit rougher and less defined. Still better than Yadif, though.


Now for QTGMC. To simplify the crazy range of options, I'm limiting myself to two presets - Faster for mostly no noise reduction and a focus on speedy processing, then Slower for best "all options" processing without getting into ridiculous processing times.


QTGMC - "Faster" Preset


Cleaner, more defined edges with more perceived detail.


QTGMC - "Slower" Preset


The key word here is "smooth". The extra processing makes the image look more defined overall IMO. My personal favorite, although Topaz AI definitely is another option if you're okay with its artificially added detail.


Addendum - Colorspace Issues


You might remember that I mentioned something earlier about colorspace issues?  The screen grabs I've shown above were all captured from DaVinci Resolve.  If I use After Effects to view the clips instead, anything rendered out by FFMPEG looks like this:


Don't see it?  Enlarge the image, then use the left and right arrow keys to flip between the other screen grabs.  You'll notice that the colors in the overall image are shifted, especially the reds.

So what's going on here?  Well, I'm still researching this at the moment, but as far as I can tell FFMPEG does some sort of screwy colorspace conversion on some footage. If you don't correct for this, then After Effects and Premiere Pro display the colors in the wrong way. 

What's confusing though, is that this doesn't happen on every file you export out of FFMPEG.  Only certain codecs have this behavior, and one of them is ProRes. Now, this isn't a new issue - I've run into a variation of this problem years ago when I was upscaling standard definition video to high definition resolutions using AVISynth and FFMPEG.  However, one of my original fixes - to use the other ProRes encoder - doesn't do anything this time.  Thankfully, the other fix - rendering out to DNxHD or DNxHR - does solve the problem.  So, if you want to be sure you don't run into any problems, use DNxHR. If you have to use both FFMPEG's ProRes output and Adobe programs, then make sure you use AVISynth to at least load the file first, and then you can add a conversion step in your .avs script:

ColorMatrix(mode="rec.709->rec.601")

Yes, you read that right: converting from rec.709 (the colorspace for HD video) to rec.601 (the colorspace for SD video) fixes the problem.

But be warned - this actually changes the way that the video looks for other programs. If you bring the video into Resolve, it looks like this:


And suddenly, we've gone orange.

Anyways, I'll keep looking into this and see if there's an easier fix. Currently, I've tried the fixes documented here:


and here:


With no success.


I'll end this post here, but look to the next post for a comparison between deinterlacing methods in standard definition.

Wednesday, March 17, 2021

Let's Test QTGMC settings - Part 1

A question that I've thought about from time to time is this: what difference exactly is there between QTGMC's various settings? There's a metric ton of them, and while I've tended to just follow the recommendations in the documentation for what to use, I'm not always happy at the results I get.

So let's not be casual. I'm pretty busy these days, but as I have time, I'm going to go through and look at what each of the major settings does to a range of sample clips, and hopefully provide a better reference than the scattershot documentation that's out there currently.

Now, obviously I don't have time to test everything, and I'm not a plugin author or somebody who is particularly skilled at programming. This is all to say: don't just take my word for it. Test for yourself, and see what works for you. If you find something different, or an edge case that I haven't covered, great. Leave me a comment below, and I'll see if I can replicate your results. If so, I will update this blog post.

Some things to get out of the way up front:

  • I'm currently using AVISynth+ 3.7 64-bit with version 3.376 of QTGMC. If you're using an older (or newer) version of either of those, you may have different results. I will update the version numbers on results below if they differ.
  • I won't compare this to VapourSynth's havsfunc implementation - at least not right away. In theory, you should have the same results, but I have noticed chroma shifting differences in the past. I'm not currently using VapourSynth, however, and am not nearly as familiar with it.
  • My source footage is mostly DV, which has a very nonstandard chroma subsampling method (4:1:1). As such, the color information in your video may behave differently then shown here. The black and white (aka luma) portion of the image should be similar, although depending on the source noise in your original footage, things might be different there as well.
  • The first clip I'm going to use to test everything is from a 15+ year old video about building straw bale houses. It was shot on a consumer DV camera (not by me), and IMO has a good combination of in-camera sharpening and a range of both noise and detail. I'll try and find a less pre-sharpened image for comparison at some point.

Please click on the pictures to enlarge. Even better, this will bring up the "lightbox" so you can flip between pics with the left and right arrow keys on your keyboard. Sorry about the lack of labels in the lightbox - I'm looking into that.


Test 1 - Overall Presets


There are a total of 11 main preset options for QTGMC: Draft, Ultra Fast, Super Fast, Very Fast, Faster, Fast, Medium, Slow, Slower, Very Slow, Placebo.


Draft


This preset is pretty much only useful as a way to check and see if your field order is set correctly. It uses a simple "bob" deinterlacing method that makes essentially no real effort to create full resolution progressive frames.

Ultra Fast


This preset uses Yadif as a deinterlacing method, and looks similar to what you would get out of VirtualDub (Which uses Yadif by defualt for deinterlacing) or some real time commercial video processing devices. It does at least give a doubled frame rate, but I would only use it for comparison with other methods.


Super Fast


Here's the first preset that takes advantage of QTGMC's features. You'll notice immediately that the blocky effects of the first two presets are gone. Personally, I think this looks ever so slightly softer than most of the other presets - possibly because it uses TDeint rather than NNEDI3 for deinterlacing?


Very Fast


You'll notice that fine detail is a bit clearer, and some overall sharpening appears to be applied. Noise reduction is kept to a minimum, however. There's also a sort of haloing artifact around edges of fine detail.


Faster


Not a huge difference in sharpness here, but if you look closely at the tassels, you'll see that they look a bit clearer. Haloing is still present, and for some reason, there's an added line artifact on the right side that isn't present in any of the other presets. Not sure why.


Fast


This is the first preset that I would actually consider using. The haloing artifacts are gone, a little extra sharpening appears to have been added, but the image doesn't look terribly "smoothed".


Medium


Similar to Fast, but appears to perform more noise reduction.


Slow


By flipping back and forth between medium and slow, I can see that the interpolation has resulted in very slightly different images, but I don't really notice a big distinction in quality between them.


Slower


This is QTGMC's default preset, and I can definitely see how some people don't like it. While it does remove more of the artifacts from the video, it definitely has more of a "smoothed" look to it, with a slight smudging of details. Again, you would have to look at these back to back to really see the differences in my opinion, but this is starting to look a little over processed. On the other hand, if you're processing video for online streaming services, you might prefer this to keep recompression artifacts to a minimum.
 

Very Slow


Like Slower, but more so. More image detail is smoothed away, but more artifacts are removed as well.


Placebo


Aptly named, although I can see very slightly more smoothing applied to the image. I personally would never use this because of the ridiculously long processing times, but if you ever wondered what it does, here you go.


Test 2 - Sourcematch/Lossless


Because I'm not specifying anything else in the command, you can assume that the rest of the settings are at default (essentially preset=Slower). The main difference I can see is that Lossless on its own has some combing artifacts, and SourceMatch=1 is a bit softer than the rest.

SourceMatch=1


SourceMatch=2


SourceMatch=3


Lossless=1


Lossless=2


SourceMatch=3, Lossless=1


SourceMatch=3, Lossless=2


Test 3 - Noise Reduction settings


These are pulled from the QTGMC examples section.


Full denoise


NoiseProcess=1, NoiseRestore=0.0, Sigma=4.0


Does what it says. Beware of the "waxy" look with this one.

Restore all noise


NoiseProcess=1, NoiseRestore=1.0, Sigma=2.0 


Yup, this works as described as well.

Restore all "stable" grain


NoiseProcess=1, GrainRestore=1.0, Sigma=2.0 


This setting is a bit more interesting. It attempts to find more "stable" elements of noise and restore it to the image. This results in reducing the flat/waxy appearance of a full denoise, but still removes a lot of noise. Not sure if I'd use it all the time, but I could see some benefit.

Suggested settings for "Strong Detail/Grain"


NoiseProcess=2, GrainRestore=0.4, NoiseRestore=0.2, Sigma=1.8, NoiseDeint="Generate", StabilizeNoise=true


Seems reasonable, but maybe not for every source. I'll try to dig into this in more detail, but for now I'll refer you to the documentation for more of what the settings mean:


Reference


Just for reference, here's the original interlaced frame:


And here's one of the individual fields:


And here's the same frame processed with Yadif in VirtualDub2:


Friday, January 1, 2021

Deinterlacing with AVISynth and QTGMC - Updated occasionally

Welcome to the new home of my QTGMC deinterlacing tutorial. This post will be updated periodically as new changes happen and new info comes out, or until a better option comes along.

Changes since last post/video:

  • I've switched to an entirely 64-bit workflow
  • QTGMC has some new requirements
  • I've dropped FFMPEG as the recommended rendering program in favor of VirtualDub2
  • AVISynth Info Tool is now the recommended way to check and make sure that you've installed AVISynth correctly.


BIG DISCLAIMER: This process may not work, may crash, or may do other things to your system. Virus scan everything you download. It's not a 100% guarantee that you'll avoid getting a malware infection, but it's a lot better than not checking at all.

If you're doing professional work, always watch any files you create using this process before submitting/uploading them to check for audio and/or video glitches.

Follow this tutorial at your own risk. 

Also, this tutorial is for Windows 10. Most of the steps work for previous versions of Windows, but may require slight modifications. Users of MacOS and other OSes should look elsewhere.


Here's the video version of the setup and basic QTGMC deinterlacing workflow:


Setup


7-zip (optional)

If you don't have 7-zip already installed, you won't be able to open many of the downloaded archives. The stable, 64-bit version should be fine.

Next, we're going to need to get AVISynth+. You can grab it from here:


If you don't already have the MSVC 2019 Redistributable installed, grab the version ending with "vcredist".

Then, we'll need to get all the filters (plugins) needed:

FFMPEGSource

Note: Version 2.40 has been shown to corrupt video frames. Please either use a different version, or use LSMASHSource as linked below.

This is what will allow AVISynth+ to load our video files. Works with almost any container/codec combination, but read the "Known Issues" section for things to look out for (hint: don't use interlaced h.264 video with it).

Note: If you do need to work with interlaced h.264 video, try LSMASHSource instead. It requires two commands rather than one to work (technically three if you count AudioDub(video, audio) to combine the two together), but can support some non-standard formats. Thanks to neonfrog for the heads up.


QTGMC

The deinterlacing plugin of choice. Requires a whole host of additional plugins, of which you will be using the 64-bit versions (if an option is given). For most uses, only the "Core Plugins and scripts" are necessary.

For the "Zs_RF_Shared.avsi" link, right-click on the link and do "Save Link As", or whatever the equivalent is in your browser of choice.

DO NOT forget to download the 32-bit FFTW3 library as well. Without it, QTGMC will not run.


With all the AVISynth filters and scripts grabbed, it's time to get the supporting software:

AvsPMod

This is like an IDE for AVISynth scripts, and is pretty much essential IMO. Grab the 64-bit version for this tutorial.


This allows us to detect processor features and check to see if AVISynth is properly installed.

Finally we need to grab a rendering program.  For ease of use, I now recommend VirtualDub2 - a fork of the original program used to render AVISynth scripts. 

VirtualDub2


When finished downloading, virus scan all the things.


Installing

AVISynth+ has a simple installer. I recommend installing into whatever your user folder is (for example C:\Users\Me\) rather than the default of Program Files(x86) so you don't have to deal with authentication requests every time you add a plugin. Also, I highly recommend checking the "Add AVISynth Script to New items menu" option. Otherwise, you can stick with the defaults.

Then, go to the plugins64+ directory for AVISynth+. For example, the default install creates a plugin folder at:

C:\Program Files(x86)\AVISynth+\plugins64+\

Extract all "x64" versions of the .dll and .avsi files to the plugins directory (if given a choice) from all plugins EXCEPT the fftw-3*.dll archive. If there's a choice between AVX, AVX2 and a version without AVX, you'll need to know what instruction sets your processor supports. CPU-Z  or AVISynth Info Tool can tell you this if you're not sure.

Now, open the fftw-3*.dll archive, then (as noted on the QTGMC page) extract the libfftw3f-3.dll file. Make a copy of it and rename it as "FFTW3.dll". Place the files "libfftw3f-3.dll" and "FFTW3.dll" in the SysWow64 folder. Don't ask me why you have to do this, I agree that it seems pointlessly tedious.

Please note: If you're only using AVISynth+ (not older versions of AVISynth) and only need to use QTGMC, you can skip the above step and just download/put the 64-bit version of libfftw3f-3.dll in the plugins64+ directory. Despite the error message in 32-bit AVSInfoTool, QTGMC will now work in both modes (although you can drop the 32-bit version of libfftw3f-3.dll in the plugins+ director to clear the error if you like, and to clear the Zf_RF_Shared error, you need to do the regular install method above)

Also, if you want to be able to run QTGMC's "EZDenoise" & "Sharpness" functions, put the 64-bit version of "fft3dfilter.dll" into the plugins64+ directory.

Thanks to Spammy Family for pointing this out.

Speaking of tedious, if you want to use the "Very Slow" or "Placebo" preset for QTGMC, it looks like you need to install the 64-bit version of FFTW in your System32 directory using the same method mentioned above.

Extract the AvsPMod archive to wherever you want to run it from - again, I recommend your user folder.

Extract AVISynth Info Tool in the same way. If you like, you can install it more officially by clicking on the AVSInfoToolInstaller.exe file, but I generally just run it directly from the "AVSInfoTool_FilesOnly" folder. 

Go ahead and run it now, making sure to select the "AVISynth 64-bit" option once loaded.  If you get errors that are not about the FFTW3 library or Zs_RF_Shared.avsi (to fix those errors, install the 64-bit version of FFTW in your System32 directory using the same renaming/copying process listed above), then double-check and make sure you followed all the previous steps correctly. You might also want to take note of how many cores and logical processors you have, along with what instruction sets are supported by your CPU. 

Finally, create a folder for VirtualDub2 and extract its archive there.


Making your .avs script


Now that everything's ready, let's go to the directory with your video files and make an .avs script. Right-click anywhere in the directory, select New, then AVISynth Script and rename it however you want. If that option doesn't show up, you can just create a new text file and change the .txt extension to .avs.

Open AvsPMod, then go to the Options menu and click on "Associate .avs files with AvsPMod". You should now be able to double-click on .avs scripts and have them open directly in AvsPmod. Do so with the script you just created.

Here's my boilerplate .avs script settings for deinterlacing:

    SetFilterMTMode ("QTGMC", 2)
    FFMPEGSource2("videofile.avi", atrack=1)
    AssumeBFF()
    QTGMC(preset="Slower")
    BilinearResize(720,540)
    Prefetch(10)


The "atrack=1" option for FFMPEGSource selects the track of audio that is passed through during processing. If the default option doesn't give you audio in the results, try "atrack=-1" instead.

Please note that by default both FFMPEGSource and (certain modes of) LSMASHSource index your video file the first time you load the .avs script into either AvsPMod or your rendering program of choice. This may take a while and give the appearance of freezing the program. When it's finished, you'll see an .ffindex or .lwi file appear in the same directory as your video with the same name as your video.

Which deinterlacing algorithm is the best? Part 1 - HD interlaced footage

Before I began, I'd like to give a special thanks to Aleksander Kozak for his help in testing and providing the HD footage used in this ...